We have a guest today on the blog! Ya’ll welcome Allie, who is one of my sweet, sweet friends! She is a fellow believer, wonderful wife to Ronnie, and one of the sweetest people I know.
She studied Interior Design and her house is just fabulous. She has a real gift! Whenever I visit her, I am always inspired, so I hope her tutorial today inspires ya’ll too!
Check out her blog Every Tradition!
____________________________
Do you have the itch to get crafty? Or do you have a piece of furniture with unique lines and you just can’t STAND the finish?
Over the years I have had the opportunity to take a couple of furniture repurposing classes, learning fun, easy techniques to bring life to old wooden objects.
I get comments on the dresser in our den and thought it would be fun to share the process with you! It is a neat story, this dresser. I did some consulting work for a sweet couple in Anderson , and they had no need for this piece anymore and offered it to me. It was in pretty bad shape with water damage and warped edges, but I just loved it too much to not take it home! I am so glad I did,and it is a special reminder of the people the Lord has brought into my life.
Enjoy! I will soon be sharing a few other DIY’s we have been up to at the Morris household….
Step 1: Sand piece
(be sure to sand off all shine from previous finish)

One thingI never realizedis that there are DIFFERENT types of sandpaper! (wow, imagine that!)
**NOTE The higher the number, the finer the paper. So, when you are initially sanding a piece, go with a low number… 60-80 will work just perfectly!
Step 2: Prime
(I use Kilz primer and it’s fantastic! Be sure to go Latex unless the piece you are working on was previously coated with oil-based paint)

** NOTE: Be sure when you are priming your piece that you don’t go too thinck with the coat. It’s better paint two thin coats of primer if necessary than to do one very thick coat. If you go thick, it’s more likely to stick… and be sticky!
Step 3: Paint first coat Valspar
It’s crucial to evaluate carefully the type of paint you want to use. I am partial to Valspar simply because you can go to Lowe’s and get a Valspar sample for a few bucks and that’s typically enough paint to cover a small piece.
When selecting your paint, remember that the more shine in your paint the more durable and easier it will to clean. Determine what look you want and then evaluate the type of use the furniture piece will get. For example, you like the idea of a wooden foot stool that will look rustic and have a matte finish, but remember if you choose to go with a satin or a semi-gloss low sheen paint, you will have to work extra hard to keep it fresh and clean. (just think practically!)
The look and maintenace of your piece is all up to you- that’s the beauty of refinishing your own piece! 🙂 You really can’t go too wrong, and if you get the first coat on and it dries and you hate it, you can ALWAYS sand it back down and start over!
**NOTE: When you paint, be sure to paint the same direction as the grain of the piece. Makes for a more natural finish. Also be sure you do not paint too thick of layers… You will need at least two coats to get full coverage. (note, one gallon of paint covers roughly 300 square feet, so your paint will go a LONG way on furniture!)
Step 4: Second Coat of Paint
(BUT NOT UNTIL THE FIRST COAT has dried for several days.)
Drying time will vary depending on the moisture in the air. Be sure when you touch your piece that it doesn’t feel tacky but it’s dried hard. (Sometimes it will take up to a week between coats)
** NOTE: Depending on the type of paint you use, you may need to do a light sanding between coats. Think about this, in order for it to stick, it has to have something to GRIP to… so sand, baby, sand! (but with a 200 sand paper… nothing coarser)
Step 5: Antiquing

(Be sure to paint or rub on stain with the grain)
Very helpful information from my dear friend (and fellow blogger) Katherine Bougie.
Visit her blog at www.http://www.bouquetofnewlysharpenedpencils.com/
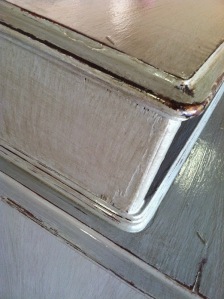
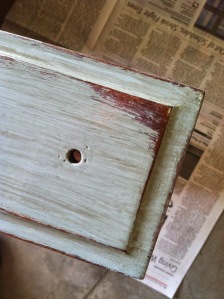
When using the antiquing technique, you will first want to distress your piece to make it look, well… like an ANTIQUE! Be sure when distressing that you think about the natural use of a piece and where it would be worn over time, and that is where you want to scratch, sand, hammer, etc. (don’t get too carried away, but enjoy! Remember, you can ALWAYS put the paint back on, so have fun!)
After distressing your piece, select the stain color of choice, and then either use a brush or PAPER TOWEL (works wonders!) to rub on the stain. Remember when working with stain, it dries quickly, so you need to work on your piece fairly quickly. The stain I like to use is Minwax and I’m definitely partial to darker stain colors.
STEP 6: Final Coat
(Can use a polyurethane or a wax sealer)
There are many options to complete the piece you are working on. For this particular piece of furniture I used a Clear gloss Polycrylic polyurethane. I used a paint brush and applied a thin layer over my entire piece and then let it dry for days before touching.

PS: The best part about refinishing old pieces is the hardware. Think twice before throwing out the old. Sometimes the patina that comes with age is exactly what sets the piece apart. Also, consider what your original hardware will look like with a little RUSTOLEUM spray paint. . .


So fun– thanks for sharing, and hope this is helpful! Love you! 🙂
LikeLike
Thank YOU for writing it! I love you more 🙂
LikeLike